- One reader in Melbourne is building such a pool.
- Several have been built in the United States, but only one of the ones I've heard of is residential. The rest are all commercial facilities.
- Insulated pools are standard when the pool sits on top of a parking structure. Apparently installations like these are simply impossible to heat if the pool is not insulated, and there are structural isolation benefits as well.
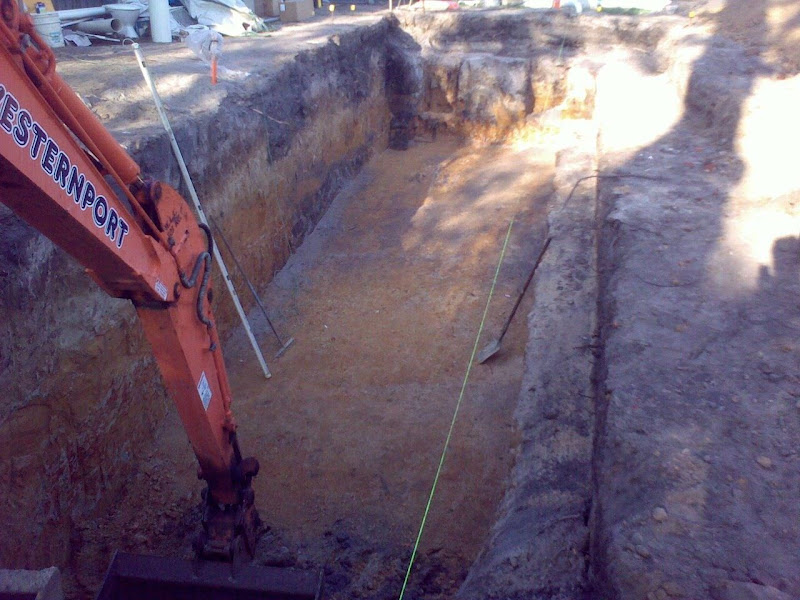
Up until now, though, no pictures! Thankfully, the reader from Melbourne has recently written in to share a few pictures of his insulated pool. Here's the standard picture of the dig:

The pool is 46 feet long, which is exactly the same length as mine. His is skinnier (10 feet wide) and more shallow (max 6 feet), which is appropriate for a lap pool. Below, it looks like they are installing an in-floor cleaning system. Very nice.
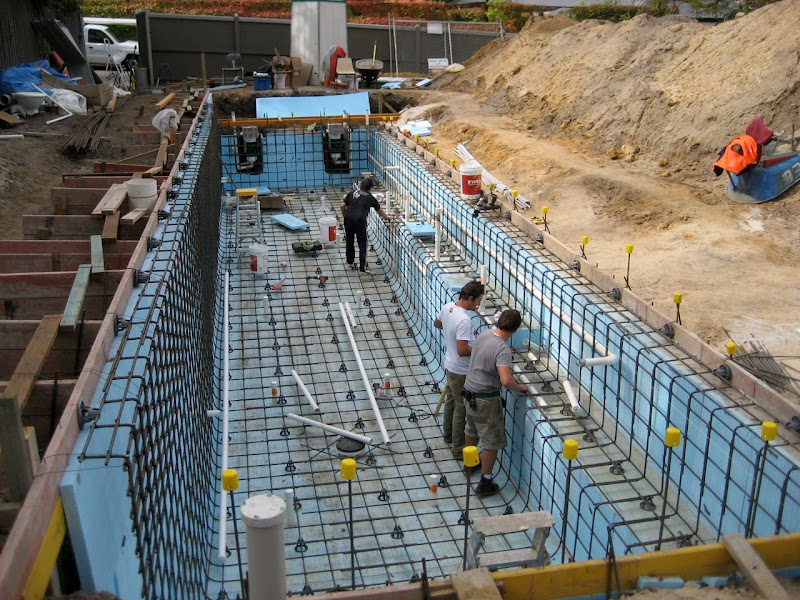
Below is a pic of the insulation going in. He is using Dow Highload 100, sold there as Dow HD300, in the same thickness that I used (2 inch). He says:
The insulation I'm using is Dow HD300 in 50mm boards. This product is made for insulating under coolroom floors with trucks driving on top, and is overkill given its compressive strength specs of 2% compression (1mm) after 20 years of 250 kPa or around 25 tons per sq meter. However, the pool contractor and engineers had never seen pool insulation done before and through an abundance of caution over-specified for the highest compressive strength product they could find to be sure it wasn't going to settle. With the loads from this pool of only around 2 tons per square meter, we have more than an order of magnitude margin of safety. In the end, the cost differential between this and lesser rated products was so small that in the interests of getting the pool contractor comfortable with signing off we went with the HD300.The upside is at least I don't have to worry about the compression issues for the expanded foam glue you'd used and hence avoids the risk you mention in your blog that this may place extra strain on the shell as it settled, and from the photos it seems the contractors have got a good solid base without the rocking problems you'd mentioned.The contractors didn't glue the boards to the soil with foam, instead they used the rather unsubtle method of nailing it through with steel rod. I had two concerns about this:
- This will mean there's some heat conduction losses through the steel rod from the soil to the concrete, though the total surface area of steel in contract with the cement shell would still be minimal so this probably isn't a big deal.
- A risk of the rod eventually rusting and applying pressure to the concrete shell, but the foam will (I hope) compress enough to accommodate any rust expansion and prevent concrete spalling off the shell were this ever an issue.
The steel rod seems like a good idea. I tried to find an equivalent product here and failed, which is why I ended up with the polyurethane foam. One other contractor I've talked with in the U.S. also used foam, but I neglected to ask him if he chose not to use steel nails for some reason.

Here in California we use Dobies to seperate the rebar from the ground/insulation. Dobies are simple 3" x 3" x 3" concrete cubes with a wire in them. Check out the much snazzier looking rebar spacers they use in Australia. The wall does not appear to have a bond beam at the top, but instead is pretty thick the whole way up.
 Insulating the piping has been a major effort on my project. It's not clear in these pictures if this pool's piping is insulated.
 Gunite going in:
 His pool is in basically the same condition as mine right now. Note the clever combination of bench seat and stairs at the right hand side of the pool. Very nice. The pool looks deeper than it is because the lot slopes up to the left, and the left hand side of the pool is a retaining wall (raised bond beam).

 Insulating the piping has been a major effort on my project. It's not clear in these pictures if this pool's piping is insulated.
 Gunite going in:
 His pool is in basically the same condition as mine right now. Note the clever combination of bench seat and stairs at the right hand side of the pool. Very nice. The pool looks deeper than it is because the lot slopes up to the left, and the left hand side of the pool is a retaining wall (raised bond beam).
It's a nice looking project, and I'm very curious to see how it turns out. Thanks a lot, Melbourne!
